Ton
-
Posts
7 -
Joined
-
Last visited
Ton's Achievements
")
Newbie (1/14)
0
Reputation
-
@Spiny: Nah, everybody's got their thing, right? We just think in 0's and 1's a bit more :-) @ThatHurtsMyHead:Cool, I would like to buy those from you. Sounds ideal for a robotics project. I will send you a PM.
-
@ThatHurtsMyHead Hello World is eternal :-) If you can get DIY CNC machine workin properly this kind of stuff should be easy. I'm no expert programmer, I just use stuff like VBS and Powershell for my work. I looked at building a CNC once as I wanted to use it to make PCBs, but it would need to be very accurate so I decided to wait till I had a good excuse to splurge on a ready made one. Still waiting. Yes, the shields are just extra electronics on a PCB that is sized to fit straight on top of the Arduino board, saves some wiring work. BTW, there are many diferent types of boards. Most boards like the Uno have connectors for experimentation, but if you are not worried about soldering you can get a tiny Arduino Nano clone for around 5$. Same programming etc, just smaller. I may actually be interested in some controllers, I will be in the US in a couple of weeks time... What type are they? @Weatherman: thanks for the compliment :-) I did look for a dehydrator shortly, but they seem to be thin on the gournd here in the Netherlands. I could probably have found one for less than I paid for my components but I had that stuff lying around anyway and I liked the idea of using the heating (it was winter) in my home already. Also, I read somewhere that some of the dehydrators get too hot for shrooms but I guess it worked for you. It certainly looks a lot less messy than my project :-) As I have made this, I was thinking of desiging something to keep my growing kits at perfect temperature and humidity as well. If only I could control the sun with Arduino.... If there are people really interested in this stuff I could potentially write a full manual etc. It is not hard but then I'm a computer guy, I'm used to this stuff. I reckon with a good search for components I could halve the cost, and could potentially preprogram boards for people. Like I said, it was a bit of fun for me, and also I did watch the whole setup like a hawk the first day I had it running, waiting for the smell of burning chips or something catching fire ;-)
-
Arduino rocks, once you get the hang of it, it's dead simple. I can post my wiring and code later if you like, once you read the code you'll get it. You can connect the Arduino board to several 'shields' or just connect to the pins directly with sensors etc, to get a fast impression search for 'Arduino shield' on eBay. And it can run autonomously, I just had a laptop connected for a while to check my temperatures but it runs standalone.
-
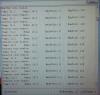
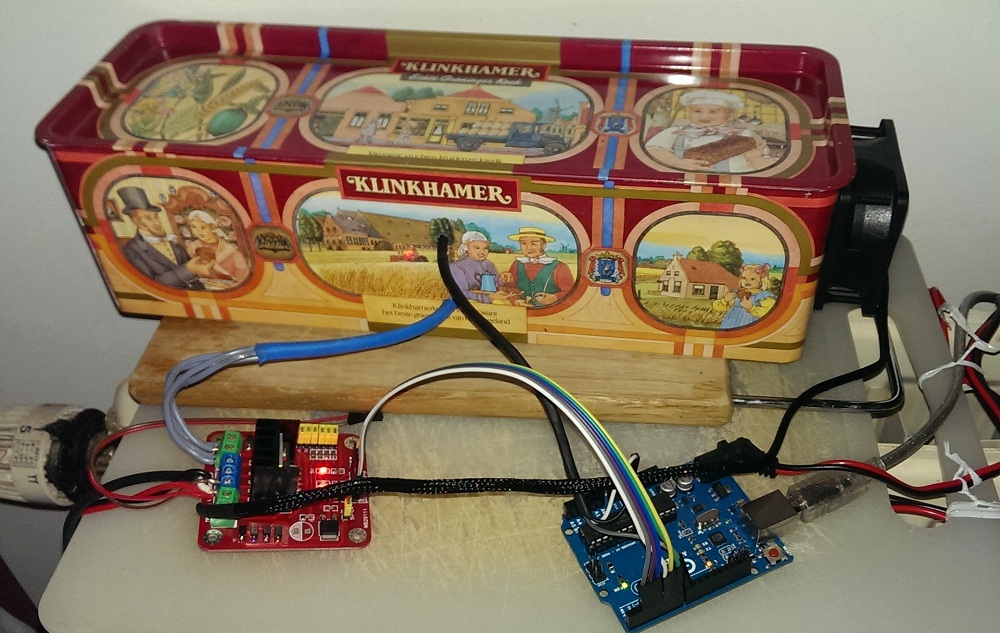
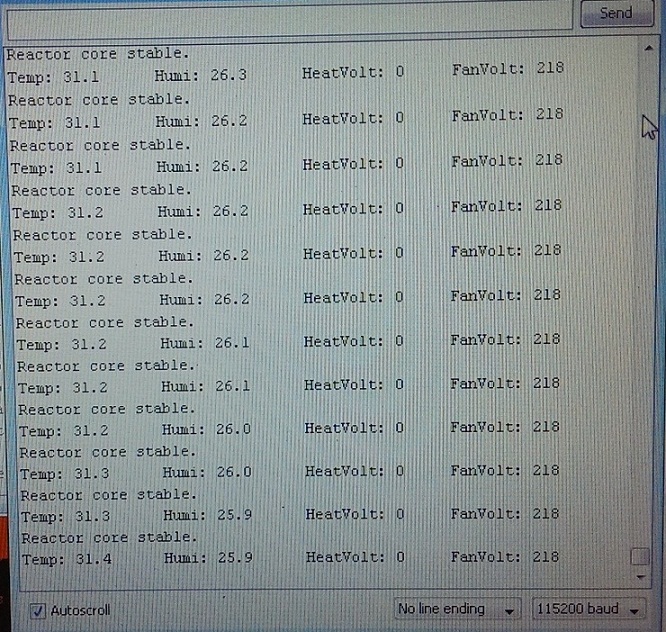
Hi all, During my last cluster period I started trying shrooms, and was very pleased with the results when compared to the awful stuff I was taking during my last cluster periods (loads of Verapamil, sumatriptan etc). As I regard the shrooms as medicine and want to know exactly what I´m doing with the dosage, I want my growing and drying process to be as consistent as possible. The temperature in my house can vary a lot and so does the amount of sun of course, so I can´t do that much to control the growing. But the drying I can... I have central heating I can place the shrooms on but they are either to hot or to cold, no consistency. So I have built my own Arduino controlled shroom dryer :-) I place it on my radiator. If it gets too hot a fan starts running to cool it down, the fan automatically speeds up if it needs to cool more. And when the radiator is off and is cold some warming mats in the drying tin get turned on, gradually increasing in heat until the right temperature is achieved. Also, if the humidity gets too high the fan does a quick purge of the air in the tin. All in all, I keep the temperature within a few degrees of 32 centigrade. Total cost for the Arduino board and parts was around 50USD, and I needed a proper power supply which cost me around 35 USD. I guess I did not save much money but I did have fun building it. Included are some pics. If anybody is interested in building their own I can post the part list and source code.